Sam sent in a few photos a week ago, within half an hour of me posting the last blog, of the various things that he had got up to on the Sunday::
 |
| The exposed part of Dinmore Manor's throat plate was painted... |
 |
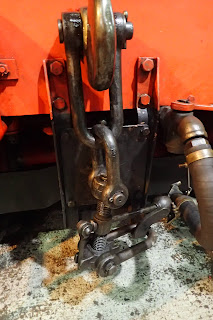
| ...3850's drag box was undercoated... |
 |
| ...and more of 3850's frames were wire brushed & primed. |
All the above photos courtesy of Sam Perry.
Moving along to this weekend, further progress was made on painting 3850's frames and tender T1761 by Anthony and Roger.
 |
| Anthony wire brushing 3850's frames |
 |
| Roger applying top coat to tender T1761 |
Saturday morning turned up a treasure trove of photo opportunities in the mess coach. First, and by no means least, new wall mounted electric heaters have appeared. The mess coach was toasty warm, and it proved hard to extract the volunteers from the kettle and the heaters to go and do some work. No doubt when the powers that be realise that the electricity bill has gone up and productivity has gone down, then the heaters will disappear, never to be seen again. We'll enjoy them while we can.
 |
| A most welcome addition! |
As you may dimly recollect from school Physics lessons, white is a poor choice of colour for a radiator from the ability to transfer heat into a room point of view. Never mind, after a few weeks in the mess coach, they will doubtless change to a coal shade of black
An item that I have been most remiss in failing to mention is the our beloved mess coach is soon to be superseded by a nice shiny new "Welfare Building"... translated from management speak, that is a mess coach without wheels. The plans have been on the mess coach wall for a few weeks now. The good news is that it will be in brick and will continue seamlessly on from the goods shed in the same style. There is no bad news, except that if the diagrams on the wall are anything to go by, we'll have to change out of our overalls and put on pin stripe suits and carry about brief cases and umbrellas. Some have noticed that there is considerable attic space available and are plotting immense model railway layouts (though why bother when there is a 12" to the foot version right outside the window). Others have noted the opportunity for setting up a barbecue and watching the trains go by on the raised platform at the south end.
 |
| Pin stripe suit, brief case & brolly |
A feature that appeared in the shed a little while back and received little publicity on this blog, was the fire hydrants. Not fire hydrants for the purposes of putting out fires... we usually like to keep them going here, these are for filling boilers and tenders.
 |
| A hydrant in use... |
 |
| ...filling Foremarke Hall's tender. |
Whilst on the subject of Foremarke Hall, John C was keen to point out a modified feature (well it is a Modified Hall after all) that John H had recently installed:
 |
| Foremarke Hall's pep pipe handle |
It looks like any other GWR pep pipe handle, however it is a slightly larger body than usual and has been stuffed with Klinger (no, nothing to do with Captain James T. Kirk's arch enemies) packing, and has been tested and found to be drip free, even with 450 PSI applied to it. Should the boiler pressure actually reach 450 PSI, you'll know by the fact that I will be running away from it at great speed!
The excesses of the Yuletide turkey etc have yet to disappear from my waistline, so when Mike said "You're nice and slim, I've got just the job for you", I was suckered in and fell for the flattery. The task was to investigate Dinmore Manor's tender and find out why it appeared to mildly flex occasionally. I've been inside tenders before, not the nicest of jobs. "It is dry in there isn't it?" I asked... "Oh yes, perfectly dry, it's been drained since the end of the season". This turned out to be a new usage of the word "dry" with which I was not familiar. Needless to say, I had also turned up in a freshly washed pair of overalls.
For those of you who have never experienced the unbridled joys of entering the water space of a tender, it is divided internally into a number of compartments to minimise the water sloshing around and upsetting the stability of the tender whilst in motion. The holes between compartments are of course designed for malnourished Victorian waifs and strays who had only just been barred from cleaning chimneys from the inside, and not well fed middle aged men. Crawling around on your hands and knees and attempting feats of contortionism that would be more suited to a teenage gymnast is the order of the day.
 |
| Not for the claustrophobic |
My inspection was inconclusive, no welds had given way and everything appeared to be rock solid
 |
| I went all the way to the float chamber in my fruitless endeavour. |
To make matters worse, Eleanor, who was on the footplate at the time dropped a large piece of wood into the coal space of the tender that had until recently taken on the function of a comfortable seat for the team rebuilding the grate in the firebox. This caused some amusement to others present on the footplate suggesting that it would have deafened me. She claims to this day that she didn't know that I was inside the tender.
For your amusement, this is how you look after emerging from the sludge at the bottom of the tender:
 |
| My legs were wet for much of the rest of the day |
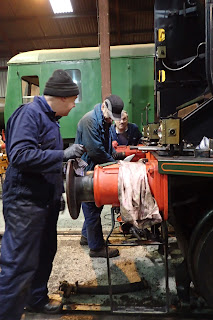
The big task for the 2807 group on Saturday was to press in the bushes into the coupling rods and start to re-fit them to the loco.
 |
| A highly visible Graham and 2807's coupling rods |
Cleaning the rear faces of coupling rods is a tricky and as nobody ever sees them fairly pointless thing to do, so they are usually protected from the elements by a good coat or two of paint. The face presented to the public when 2807 reappears in traffic will of course be the bare steel currently on the underneath in the above photo.
 |
| Pressing in one of the bushes |
By the end of the day, one of the coupling rods was back in place.
 |
| Trailing coupling rod re-fitted |
The cylinders that the piston valves live in can be re-bored rather like a car engines cylinders can be. To accommodate the larger bore size, the heads for the piston valves come in two sizes, A (small) and B (large). Although Dinmore Manor's fireman's side has been bored out large enough to warrant a B size set of piston valve heads, none were available at the time, so she has run with the A size heads. A set of B size heads have now been sourced and will be installed for the new season. My next job was to dismantle the piston valves and put on the B size heads
 |
| A size heads in place |
 |
| The steam side of the B size heads in position. |
The merry band of people painting 76077 in the marquee in the car park have made excellent progress, with much of it now in a second undercoat (the orange/brown colour in the photos below), with some of the wheels even progressing into a top coat of black.
 |
| Cliff undercoating 76077's frames |
I had noticed that in several places, there were black crosses marked. Apparently this doesn't signify the location of buried treasure, just that no more paint should be applied.
 |
| X marks the spot! |
 |
| Top coated wheels. |
You may recollect from this blog a few weeks ago that a side fire bar from 2807 had a split in one part of it. A new one was quoted as having a lengthy lead time, so a decision was taken to repair the old one as an interim solution and will at least allow it to be steam tested in the near future.
Before it could be welded, it needed to be heated up
 |
| Eleanor heating the fire bar... |
 |
| ...and Joe welding it back together again. |
Next stop for Dinmore Manor was out in the yard to get coaled up.
 |
| Jeff dropping the first of a number of bucket loads of coal |
Meanwhile, John finished off installing the mud hole doors. The tried and trusted method of warming up the neoprene sealing rings in a tea pot full of boiling water was employed.
 |
| I'll stick to peppermint tea thanks. |
 |
| John installing one of the less accessible mud hole doors. |
The other major task taking place was the extraction of the regulator housing from 3845's boiler. This is not a simple task, it's a pretty heavy lump of cast iron securely affixed to the smoke box tube plate and from a health and safety point of view, you really don't want it to come crashing down on you when you finally pry it loose, the paperwork involved would be horrendous. It probably wouldn't do the casting any good either. The trick was to gas-axe the nuts that held it in place off, whilst using the forks of the telehandler to make sure that if it did break free, that it couldn't fall. Once the nuts were all off, the next step was to heat the casing cherry red, stand well clear and let the telehandler give it a few nudges to free it up and then lift it down.
 |
| Heat being applied... |
 |
| ...it's coming free... |
 |
| ...regulator housing in flight... |
 |
| ...and left to cool down for a while. |


